Kubernetes Gateway Per Cluster
Overview
In this approach, each environment (dev, prod, etc.) has its own dedicated Kubernetes cluster hosting an instance of the Kubernetes Gateway. In this pattern, the Kubernetes Gateway will have visibility over all namespaces (or a predefined set of namespaces) in the cluster.

Advantages
- Isolation: Each environment operates in its own dedicated cluster, providing the highest level of isolation and minimizing the risk of interference between environments.
- Security: With separate clusters, it's easier to implement stringent security policies specific to each environment.
- Performance Predictability: Resources are exclusively allocated to each cluster, guaranteeing consistent performance levels.
Considerations
- Resource Utilization: This approach may require additional resources due to the need for separate clusters for each environment.
- Administrative Overhead: Managing multiple clusters can be more complex and may require additional administrative effort.
Installation Guidelines
Section 1: Add Kubernetes Gateway Helm Repository
Note
If you'd like to use the commercial Docker images and Helm chart, please refer to the Helm Repository with Commercial Docker Images guide and skip this section.
Adding the Kubernetes Gateway Helm repository allows your system to fetch and install the latest Kubernetes Gateway components from the remote repository. This ensures that you are always using the most up-to-date version of Kubernetes Gateway.
```console helm repo add wso2apk https://github.com/wso2/apk/releases/download/1.3.0-1
helm repo update ```
Section 2: Install Kubernetes Gateway Components
Note
If you followed the commercial Docker images section, please use wso2 as the repository name instead of wso2apk from now on.
Ensure that you have applied all required changes to the values.yaml file as mentioned in the Helm Repository with Commercial Docker Images guide before proceeding with the Helm installation.
Next, install the Kubernetes Gateway components to set up the necessary infrastructure for managing and deploying APIs within your Kubernetes cluster.
Install the Kubernetes Gateway components and start the WSO2 API Platform For Kubernetes. Consider apk as the
-
Download the
values.yamlfileTo obtain the
values.yamlfile, use thehelm show valuescommand. Replace<repository-name>with the actual repository name and<version-of-APK>with the desired version of the Kubernetes Gateway. Run the following command:helm show values wso2apk/apk-helm --version 1.3.0-1 > values.yamlhelm show values <repository-name>/apk-helm --version <version-of-APK> > values.yaml -
Install the Helm chart
Most production deployments require customization of the values.yaml file. If you have no custom changes, you can use the default configuration as-is. To begin the installation, run the following command.
helm install apk wso2apk/apk-helm --version 1.3.0-1 -f values.yamlhelm install <chart-name> <repository-name>/apk-helm --version <version-of-APK> -f <path-to-values.yaml-file>
Optional
If you want to update an existing Kubernetes Gateway installation, use the following Helm upgrade command. The --no-hooks flag disables the hooks available in the Kubernetes Gateway Helm chart.
helm upgrade apk wso2apk/apk-helm --version 1.3.0-1-f values.yaml --no-hooks
helm upgrade <chart-name> <repository-name>/apk-helm --version <version-of-APK> -f <path-to-values.yaml-file> --no-hooks
Verify the Deployment
Verifying the deployment confirms that all Kubernetes Gateway components are successfully installed and running as expected. If any issues arise, troubleshooting them at this stage ensures a smooth API deployment process. Check the status of deployed pods:
kubectl get pods
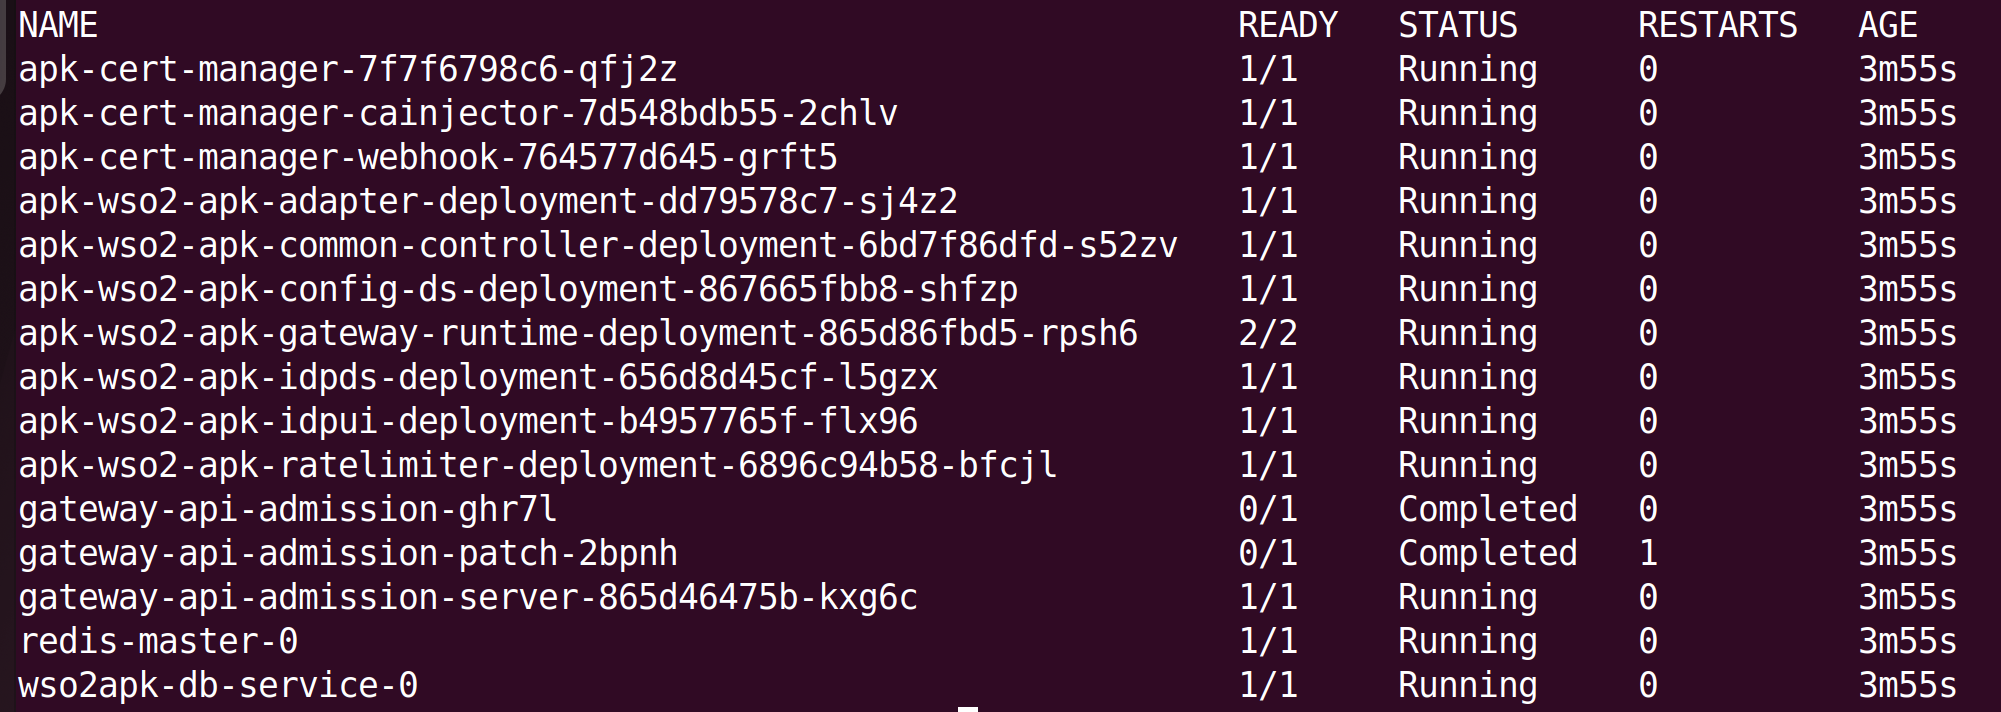
Important
Except for the gateway-apim-admission and gateway-apim-admission-patch (which will run as soon as Kubernetes Gateway is installed and then complete), all other pods should transition to the running state. If they have not, please refer the FAQs to troubleshoot the problem.